
How to Build a Gaming PC
- Missouri Scholars

- Jun 23, 2022
- 15 min read
Updated: Jun 30, 2022
by Henry Bueltmann

Prebuilt PCs are a scam. You will not get the quality of parts that you should. They will cut corners and they will ruthlessly overcharge you. The only way to truly get a good value gaming PC is to build it yourself. This sounds very difficult, and it is, but it is possible. I built my first PC when I was 14 years old and it is the very PC I use to this day. Something that would’ve helped me a lot back then is a comprehensive article detailing all the most important information needed to make the right purchasing decisions and to then actually assemble the parts, as well as what to do with it after you build it. That is what this article will be.
Requirements:
1 ordinary Phillips head screwdriver
A good surface to build it on such as a table
At least 800 dollars
Hope
Good tape
That’s it. You really don’t need crazy specialized tools. A normal sized screwdriver. And yes, tape is actually something you may need, more on that later.
For the purposes of this guide, I will assume you are building a PC for modern gaming in a 1080p resolution. The price to do this comfortably right now is 800 dollars, but the PC parts market can get a bit quirky at times so this is subject to change.
Part 1 - Making a parts list
There are a lot of PC part options out there, which can be extremely confusing for beginners. Luckily, there is one website that lists these neatly for you that you can plan your parts list on. PCPartPicker. The rest of this section will be what parts you should pick.
CPU
The first thing on PCPartPicker’s list is the CPU. This is one of the most important parts of your PC. The CPU is responsible for doing tons of math while you’re gaming. If you are playing Battlefield and there are lots of explosions and destruction around you, your CPU usage will be higher. One of the most important specifications of a CPU is core count. Every core is like its own CPU. More cores means you can do more things at once. However, more cores does not necessarily mean faster or better. 6 cores is sufficient for 1080p gaming, and more than that will have diminishing returns unless you are doing much more intensive tasks.
There are two CPU manufacturers. AMD and Intel. AMD specializes in gaming CPUs, while Intel makes CPUs for just about any purpose. Each manufacturer is about even with each other, but there are pros and cons that can influence your decision.
Pros of AMD:
Generally better multi-core performance
All CPUs can be overclocked
Comes with a good stock CPU cooler
Easier to understand naming techniques, won’t buy the wrong CPU
CPU sockets are used for a long time, making upgrading your CPU cheaper
Better integrated graphics on CPUs that have them
Cons of AMD:
Often loses in single-core performance
Higher frequency RAM is important for performance
Pros of Intel:
Generally better single-core performance
More options
Comes with both high performance and high efficiency cores
Cons of Intel:
CPU sockets are replaced often, meaning upgrading is harder and more expensive
Stock CPU cooler is insufficient for gaming, requires purchase of aftermarket cooler
Single-core performance improves performance in games that use few cores, mostly older games such as CS:GO or Dota 2. Most modern games will use as many cores as possible.
A CPU cooler is a fan that goes directly on top of your CPU to dissipate heat. Both manufacturers sell their CPUs with coolers included, but stock Intel CPU coolers will run hot while gaming. You can buy an aftermarket CPU cooler for either manufacturer that can improve temperatures.
The CPU connects to the motherboard via a CPU socket. Every CPU has a specific socket it goes in. AMD has been using one socket for many years, the AM4 socket, while Intel uses many different sockets. To upgrade to a CPU that uses a new socket, you have to buy a new motherboard too. It’s important to note that AMD is moving on to a new socket with their next CPU generation, so the AM4 will be outdated soon.
AMD has a very simple gaming CPU lineup.

The latest generation is the 5000 generation. This includes the Ryzen 3 5300, Ryzen 5 5600X, Ryzen 7 5800X, and Ryzen 9 5900X. There’s a few others, but they are irrelevant to this guide. The Ryzen 3 is the low budget low core option for light gaming. The Ryzen 5 is the midrange 6 core option for comfortable modern gaming. The Ryzen 7 and Ryzen 9 are higher core counts and for more intensive tasks or high resolution gaming. The Ryzen 5 5600X has 6 cores, and is the good value midrange CPU that you should buy if you choose AMD. All AMD CPUs can be overclocked, but you will likely want to buy a stronger cooler than the stock one for this.
Intel has a more complicated CPU lineup

The latest generation is the 12th generation. This includes too many options to reasonably list in this article, so here is a chart.

The relevant ones are the i3 and beyond. i3 is for basic web browsing and office work, not gaming. The i5 is their midrange gaming option which you should consider for your build. i7 is for high end gaming and intensive tasks. The i9 is for absurd tasks and extreme end gaming.
For gaming, you should really only consider the amount of performance cores. Efficient cores are useless for gaming.
Many of these Intel CPUs come with processor graphics, which you do not want for gaming. We will be using a separate dedicated graphics card which can give much more power. Intel processor graphics should not be considered for gaming beyond Minecraft and Roblox. The F on the end of a CPU name indicates that it does not come with processor graphics, meaning it is cheaper and has better temperature.
The i5-12400F or the pricier i5-12600KF(not listed) are what you should consider for Intel. The K on the end means the CPU can be overclocked.
What does a CPU look like?

It is a very small square. AMD CPUs have golden pins on the bottom, do not touch these or you will ruin the CPU. Intel CPUs have golden circles on the bottom, which you also should not touch just to be safe.
CPU cooler
This is a large fan and radiator that goes straight on top of your CPU. Noctua, Cooler Master, Corsair, Arctic, and be quiet! are all reputable CPU cooler brands. If you have an Intel CPU, spend at least 30 dollars on a CPU cooler from one of these brands. If you have an AMD CPU, you only need to get an aftermarket cooler for Ryzen 7 or 9 or if you plan on overclocking your CPU (not something most people will need to do).
Stock coolers come with thermal paste already applied. However, most aftermarket coolers do not, meaning you need to buy thermal paste. Thermal paste is placed on top of the smooth part of your CPU in a small amount.
Motherboard
The motherboard is what all your components will connect or even fully attach to. Motherboards come with a CPU socket for placing your CPU, RAM slots for your RAM, and PCIe slots for your graphics card.
After picking a CPU, PCPartPicker will automatically only let you pick motherboards that are compatible with your CPU. There are many sizes of motherboards, but the ones you care about are ATX, micro ATX, and mini ITX. In a normal sized gaming PC you want ATX or micro ATX. If you are building in a very small case, you need mini ITX. I do not recommend a small case for your first ever build, nor do I recommend building a gaming PC in a small form factor due to temperature. Popular and credible motherboard brands are ASRock, Asus, Gigabyte, MSI, and NZXT. The ASRock B550 Pro4 or ASRock B550M Pro4 are good value motherboards to pair with an AMD CPU. The M variant is micro ATX. It can do all that you need without destroying your budget.
A motherboard has a LOT of different connection points on it. Here are the important ones listed.

Sata ports are for plugging in drives that look like this. They are easy to spot on any motherboard, always extending off the right side of it. Circled in blue.

PCIe slots are for connecting your graphics card. They are easy to spot and generally in the same place on every board.Circled in green.
The CPU socket is very easy to spot. It is above the PCIe slots. This is where you will place your CPU. Circled in yellow.
The RAM slots are right of the CPU socket. This is where your RAM will be placed. Circled in red.
Of course every motherboard looks different and these might be in different places on different motherboards. It is important to consult your motherboard’s manual to locate these, and consult the internet for what plugs into what. This is not a complete list, there are many different places where cables must be plugged in and some special slots for certain optional parts.
RAM/Memory
Memory and storage are not the same. Storage is talked about later. RAM/memory is like your budget for how many programs you can run at once. When you have 20 tabs in your web browser and have Discord open and are running a modern game, your RAM will be under high usage. The more RAM you have, the more applications you can have open without your computer slowing. 16 GB of RAM is plenty for a modern gaming PC, no game demands more than that and you will likely never need more than that.
You want at least 2 sticks of RAM in your PC. Having only one stick will cause it to slow down at higher usage. 2 sticks of 8GB each will add up to 16GB of RAM.
There are a lot of RAM brands, and most of them sell the same product. It is generally just a few companies actually making the RAM, and all the sellers do is add heat sinks and aesthetic design. As such, it really doesn’t matter what brand of RAM you get. Just make sure that both your RAM sticks are the same brand.
What does make a difference in RAM is frequency. Both your sticks must be the same frequency. For AMD CPUs, a frequency of at least 3000 MHz is recommended to get maximum performance. Higher frequency has rapidly diminishing returns. On Intel CPUs, frequency matters little, but it is still a good idea to go 3000 MHz or more.
PCPartPicker has plenty of 2x8GB RAM kits indexed, so what you should do is just have it automatically add RAM from a filter. Here’s how.

After selecting these options from the bar on the right, click add from filter near the top of the page.

PCPartPicker will automatically choose the cheapest option at the time that meets that filter.

Upon writing this article, this is the RAM it automatically selected. It will likely be different for you.
Storage
Storage is a bit of a tricky thing. It is a critical component of your PC, but if you need to save money it is easy to upgrade later. When first building your PC I suggest one terabyte of storage, but if you really need to cut back on cost then you can get 512 GB of storage and upgrade it later quite easily.
There are two types of storage. Hard disk drives (HDDs) and solid state drives (SSDs) SSDs are drastically better. They load files significantly faster. That means faster install time for games, faster loading times for games, faster startup times for your PC, and faster file transfer. HDDs should only be considered for mass storage as buying lots of HDD storage is cheaper than SSD storage. If you need to store an absurd amount of files then a large HDD would make a good secondary drive. You still want an SSD to install Windows on so that you can use the high startup times SSDs offer.
There are two types of SSDs. The older and slower 2.5 inch Sata SSDs, and the newer and faster M.2 SSDs. M.2 SSDs are a bit faster, but also more expensive. But wait, there’s more.
There are two types of M.2 SSDs. PCIe and NVMe. NVMe is much faster for a small price increase.
Any type of SSD will provide drastically higher speed than a HDD.
M.2 SSDs look like this

About the size of a stick of gum. They slot directly into the motherboard and use a special small screw that should come with your motherboard.
Sata SSDs look like this

Much larger. These can go absolutely anywhere in your case. They use two cables to plug in, one to the motherboard and one straight to the power supply.
Is the speed difference between Sata and M.2 worth the cost increase? Decide for yourself. The biggest difference between M.2 and Sata is in file transfer speed, it is seen less in Windows load times and game load times.
So, 1 TB of SSD storage will fit many games. If that is out of your price range, 512 GB and then upgrade later. You can use a filter similar to the RAM one for selecting this.

Set the minimum capacity to 1000 if you want a terabyte. Uncheck 2.5” and set NVMe to yes if you want the highest speed possible, otherwise leave 2.5” checked and leave NVMe on all.

Note about Samsung drives, they are known to require special Samsung software to clone the files on the drive, and may only clone to other Samsung drives, so I avoid them.
To mount a Sata SSD in your case you can just use strong tape and put it on any part of the case. It’s only cables that connect it so it can really be anywhere in the PC, and tape is fine to use.
Graphics card
Time for the most expensive and useful part of any gaming PC, the graphics card or GPU. The graphics card is responsible for rendering the game environment around you. As you probably know, modern AAA games have extremely good graphics, so this demands a high end graphics card to run well. When you are playing Red Dead Redemption 2 and looking over a vast beautiful landscape, the GPU is under high load.
There are two GPU manufacturers, AMD and Nvidia. Nvidia used to dominate the market, but AMD has become a competitor in recent years. The latest of each company is AMD’s RX 6000 series and Nvidia’s RTX 30 series. Here’s how the naming works.


What you should consider for an ordinary 1080p build is the AMD Radeon RX 6600 (XT optional) or the Nvidia RTX 3060 (Ti optional)
Graphics cards are not only manufactured by AMD and Nvidia. They give the cards to other manufacturers who then modify and improve the card. An RTX 3060 bought from Nvidia itself (reference card) will not have the level of performance or cooling as an RTX 3060 bought from Asus, EVGA, MSI, Gigabyte, or other third parties.
Pros of AMD GPUs:
Radeon software for easy tuning, overclocking, and control
Better support for Linux
Generally cheaper (subject to change)
Cons of AMD GPUs:
Drivers can act a bit sussy, causing bugs
Pros of Nvidia GPUs:
Better ray tracing (RTX)
DLSS can offer better performance
Drivers are tested and reliable
Cons of Nvidia GPUs:
Generally pricier (subject to change)
Worse Linux support
Overclocking is difficult
Higher power usage
The performance difference between the RX 6600 and the RTX 3060 is mostly equal. Certain games will perform better on certain cards depending on how the games are optimized. You will be able to run modern games on ultra settings in 1080p at 60 FPS with either card, even Cyberpunk 2077 (without ray tracing). Personally, I say go with whatever you can get for cheaper.
The best place to buy graphics cards is usually Micro Center. You can go to the Micro Center in Brentwood and check the prices compared to Amazon and Newegg. Wherever you can get either card for cheaper is what you should go with, with one exception. If you want to use Linux, it is best to buy an AMD card as they perform substantially better on Linux than Nvidia cards.
If you do choose to buy the more expensive XT/Ti version of one of these cards, the RX 6650 XT is better than the RX 6600 XT and the RTX 3060 Ti is almost always dominant in performance.
The PCPartPicker filter you should use is this.


PCPartPicker does not list every possible graphics card, so it can be worth it to manually check Amazon and Newegg for better deals. You should also check Micro Center first if possible, as they often have the best prices and stock.
Case
Case choice is fairly simple. Pick something that looks nice and isn’t absurdly expensive. A glass panel on the side of the case is basically mandatory, as it is awesome seeing the inside of the PC you built and watching the parts go. PCPartPicker has a good selection of cases, and you can also check Amazon and Newegg yourself for things you like.
There are many case sizes available. The relevant ones are ATX mid tower and microATX mid tower. There are much smaller cases, but these are really not intended for gaming PCs and will likely have poor cooling.
Every case should come with at least 1 fan, which should be enough. Buying more fans is fairly cheap. You can also buy RGB fans for pretty colors.
Do not buy an NZXT H510 unless it is the flow version, as the non-flow has terrible cooling.
When selecting a case, make sure it supports whatever size of motherboard you selected.

Also make sure you get that beautiful view of your PC parts going

And don’t forget to select a reasonable size and quality
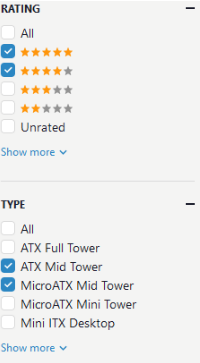
I suggest an ATX mid tower for your first build as more space to build in means an easier build and easier cable management, but if you have strict space limitations then microATX mid tower is still good.
Power supply
The power supply plugs into just about every other component to feed it power. It’s also the part that you plug directly into the outlet in your wall. You need to make sure your power supply, or PSU, has sufficient wattage to keep your PC going during intense gaming. Use this calculator to determine what wattage you need, and then go a bit above that so you have room for overclocking or upgrading later. A 550 watt power supply should be a good pick if you’ve been following along with my recommendations so far. You do not want to cheap out on this as this is the one component that can fry your whole build if it fails. SeaSonic is a reputable brand. Be sure to check the reviews on PCPartPicker for every PSU you consider. You should buy an ATX form factor power supply.
Monitor
That’s right we are skipping operating system for now. You can pick up a 1080p monitor off Amazon for 100 something bucks. I personally suggest two monitors for ultimate gamer style and the ability to view two windows at once, I can’t go with only one anymore. Discord on one monitor and the game on the other, Zoom meeting on one monitor and notes on the other, school Microsoft Teams meeting on one and a video game on the other, the possibilities are endless.
WiFi
If your motherboard doesn’t have WiFi in the name then it probably doesn’t have wireless capability. You have a few options.
Buy a USB WiFi antenna for 10-20 bucks off Amazon and plug it into your PC
Use a wired connection, which all motherboards can do
Personally my PC is upstairs and my router is downstairs, so I have a WiFi range extender in the hallway and my PC is plugged into that for WiFi, it gives me good speeds.
How to assemble the parts
I cannot possibly explain this over text. Watch this. You do not actually need a static electricity wristband like he says. If you are buying an AMD CPU it installs differently than an Intel CPU, so watch this too.
Actually setting up the PC after building it
Now you’ve got a big expensive beautiful looking thing that is completely useless. If you turn it on you will notice it just goes straight to the BIOS. The BIOS is software that comes with every motherboard which allows you to do basic setup and settings changes. Here’s some tips while you’re in there:
Make sure all your parts show up right
Don’t fiddle with random stuff
So if you want to put Windows or Linux on there and actually start doing stuff with your PC then here’s what you need to do.
Step 1. Acquire a boot USB.
This is a magical USB drive you use to install an operating system on the PC. To get a Windows 10 USB, go to Microsoft’s website on another Windows device, download the create Windows 10 installation media tool, plug in a USB drive of at least 8 GB, and run the software. Instructions in the software will tell you what to do. You want to create a USB installation media not upgrade this PC.
If you do not have any access to a Windows device, not even a friend’s PC or an old laptop, then you can buy a USB drive with Windows 10 and a product key from Best Buy for a bit over 100 bucks.
To get a Linux USB, download or torrent the ISO for your Linux distro of choice and use BalenaEtcher to make a USB drive into a Linux boot USB.
Step 2. Plug in your USB to the new PC.
Any USB port will do. Plug in the USB drive and then restart/power on the PC and it should boot into Windows or Linux setup. Do not add WiFi during the Windows setup and it will be way easier for you. The mute Cortana button is in a corner.
Cheesing the product key paywall
Windows 10 (do not use Windows 11) can be purchased from the official Microsoft website for like 100 bucks. If you don’t wanna pay that much then there are alternative and legally gray means of getting it.
Reusing an old product key
If you have a device running Windows 10 now, you can find your product key on that and then reuse the key to activate your Windows on the new PC. This is not guaranteed to work, but it is possible.
Modded Windows 10 (advanced users)
Using Ghost Spectre Windows 10 you can get a smoother and better performing Windows 10. I don’t fully recommend this due to potential security issues, but this is a free way of getting Windows 10 that is known to work.
Just straight up not activating Windows
You can use WIndows unactivated. You get a constant watermark in the bottom right of the screen, but it is usable. Not recommended.
Using Linux
Linux is free
After Windows installation
Setting up all the software and stuff you need is tedious. Use Ninite to mass install a ton of stuff at once, making life way easier.
Drivers are very important to install before gaming. They are how the game communicates with and fully utilizes your GPU and they will make your whole screen look way nicer. Get Nvidia drivers here and remember to untick the GeForce Experience option during installation. Get AMD drivers here. I recommend Radeon software with AMD cards.
How to enjoy your new PC
Step 1:
Download some fun videogames
Step 2:
Play them
Step 3:
Enjoy your epic new PC
Have questions? Message me on Signal! (314) 502-8433


Comments